How to Make a Formica® Laminate Table
Get step-by-step video instructions and a complete supply list for creating a tabletop out of your favorite Formica® Laminate.

DIY Video Project: A Formica® Laminate Table
If you’re creating a new table from scratch or have an old tabletop that could use a new look, you’re in the right place! This video and the instructions below will guide you through the process of applying new Formica® Laminate sheets.
Selecting Formica® Brand High Pressure Laminate
Today’s homeowners seek a wide selection of laminate décors across woodgrains, patterns and colors for maximum design flexibility. Formica® Laminate stands out for its durability, easy maintenance, affordability, and above all, simple installation.
To achieve a clean, professional look, it’s important to use the right tools and techniques when cutting and applying laminate. You’ll find everything you need below. However, if you want an even deeper dive, learn how to cut Formica® Laminate to explore best practices for avoiding chips, cracks and breaks.
Supply List
- Drop cloth
- Sawhorses
- Measuring tape
- Contact cement
- J-Roller
- Router with flush trim bit
- Safety glasses
- Circular saw with fine carbide-tipped blade
- Table legs
- Household cleaner and cleaning cloth
- ¾-inch MDF board
- Markers
- Laminate for top and edges
- Paintbrush
- Detail sander
- Paint roller and tray
- Dowel rods with a diameter of ½ or ¾-inch and long enough to go beyond the width of the laminate which is oversized to the item being made
- Fine tooth mill file
- Table legs
- Staple gun and 7/8-inch staples
- Acetone and paper towels
Put Safety First
Before you begin, make sure your room is well ventilated and read the adhesive's precautions and directions. Also, be sure to wear safety glasses when using any power tool and cover your floor with a drop cloth.
Get Started
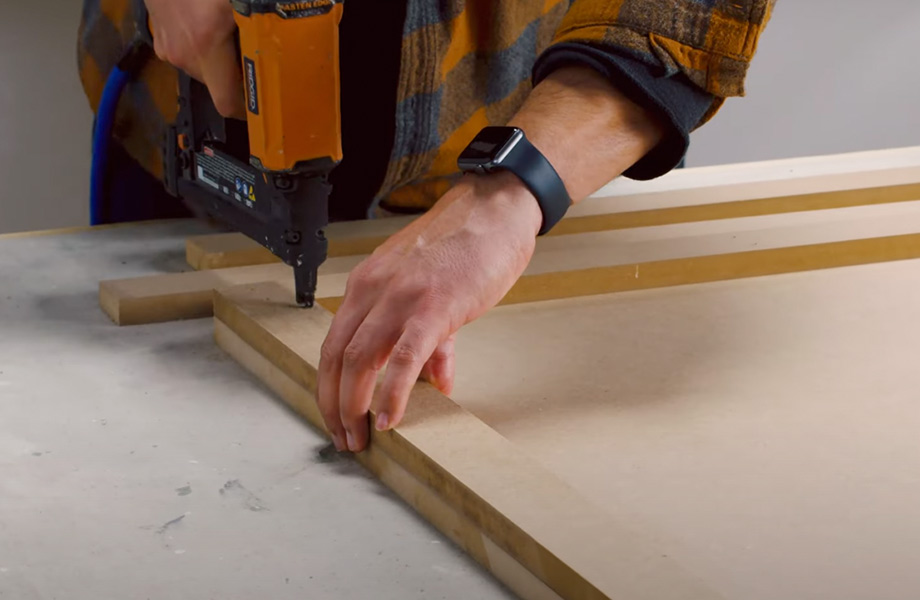
To create your Formica® Laminate table, start with a piece of medium-density fiberboard (MDF) or particle board. Measure and cut the board to the desired tabletop size. You’ll also need to cut 2-inch-wide strips of board to build up the edges of the top.
Once strips are cut, use wood glue to adhere and then staple the wood strips around the perimeter of the top, making sure the strips are flush with the edge of the top. Set your board on the sawhorse and wipe off any debris with a damp cloth. Let the top dry.
Measure and Cut the Formica® Laminate
Now it’s time to cut the Formica® Laminate décor sheet to cover the top of the MDF. It’s important to get an exact measurement of the table’s size.
You’ll want to cut the Formica® Laminate to be 3/8 to 1/2-inch larger than your measurement on all four sides to get full coverage around the table. You’ll be trimming it down later.
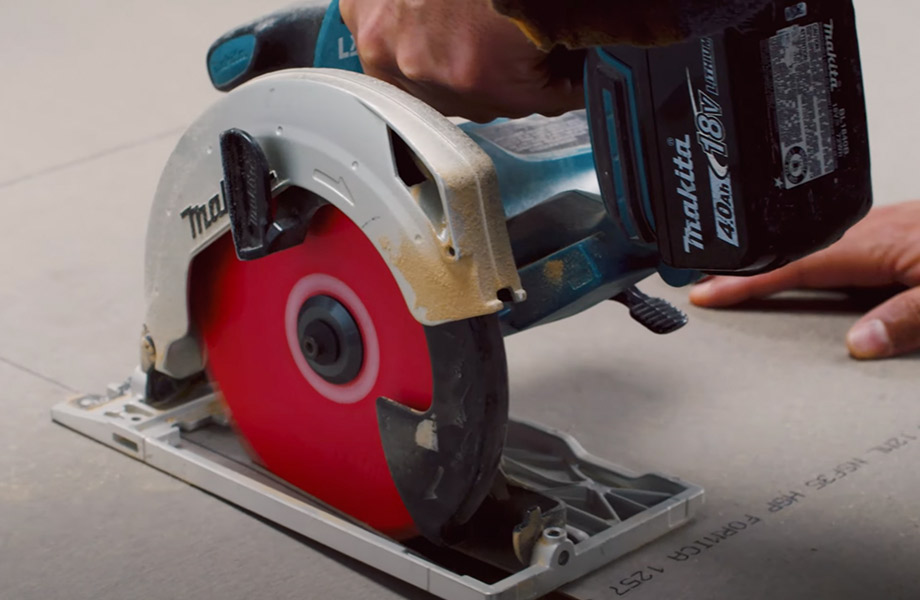
Once you’ve measured the laminate sheet, cut it using a circular saw with a fine, carbide-tipped blade. Remember to turn the Formica® Laminate sheet so the décor side faces down when you cut it. Then wipe the surface to remove any dirt.
Cut and Affix the Edge Strips
Next, measure and cut edge strips of Formica® Laminate to use on the table sides. Just like the tabletop, you’ll want to cut the laminate 3/8 to 1/2-inch larger than the size needed, so you have enough coverage.
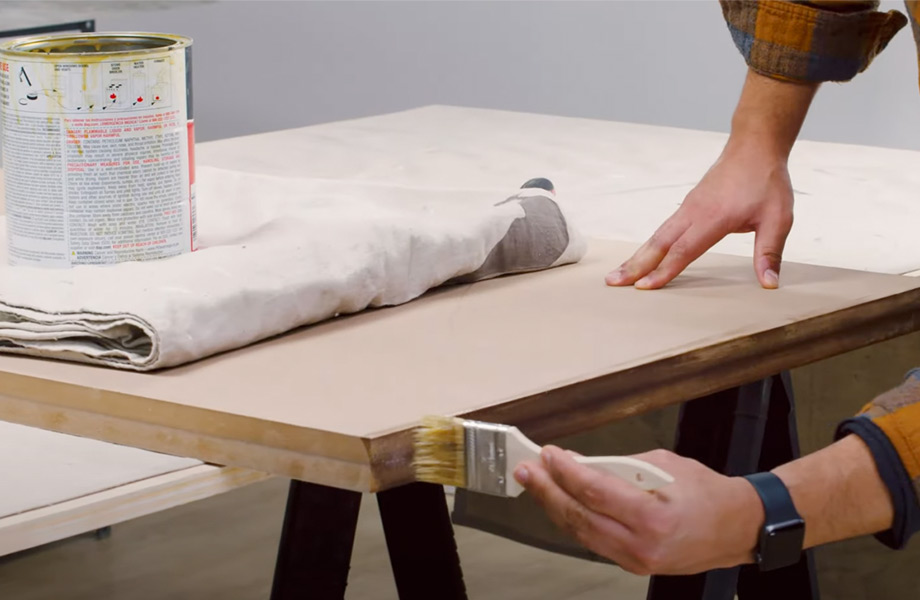
Next, brush contact cement on the BACK of the Formica® Laminate strips, then apply two coats of adhesive to the table edge. Let the adhesive get tacky before applying the edge strips by hand. Then, use a J-roller to apply even pressure to bond the edges to the table, working from the center out.
Trim and Sand
After each edge surface is covered, trim the excess material on the sides and trim the ends with the router and flush trim bit. Use a detail sander to make sure the Formica® Laminate is not higher or wider than the substrate. Then wipe the surface to remove any debris.
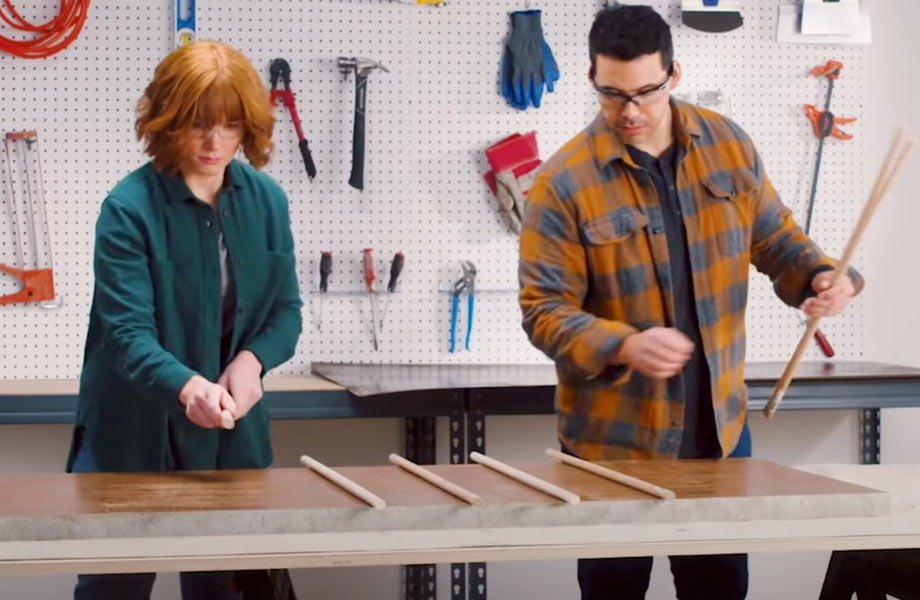
Now, you’ll use a paint roller to apply contact cement to the back of the Formica® Laminate sheet for the tabletop as well as to the surface of the table. While the adhesive gets tacky to the touch, place your dowel rods six inches apart on the table’s surface, ensuring they are long enough to hang over the edge for easy removal.
With the laminate on top of the dowel rods, align the surfaces so the overhang is parallel to the tabletop. Then, slide the dowel rods out, starting with the center and working out. Immediately apply pressure to the tabletop with a J-roller.
Final Trim and Attach Legs
Use a flush trim router to trim the edges. Then, file the edges in a downward direction to get them flush and remove any sharp edges. Clean the top and sides thoroughly with acetone to remove any extra adhesive and then use an everyday household cleaner to wipe the top again.
Let the whole tabletop dry at least 24 to 48 hours before re-attaching the legs. You could also consider changing the look of your table by adding upscale legs from IKEA or other home store. Now your one-of-a-kind table is ready to use and enjoy!
More DIY Tips and Tricks
If you’d like more home how-to's, explore our DIY tips for videos and articles geared toward working with Formica® Brand products.


